How To Delete TeraBox Account In 10 Easy Steps | A Complete Guide 2025
Feeling fed up with TeraBox? Whether it’s the relentless ads, sluggish upload speeds, or worries about your data privacy, you’re not alone in wanting to quit. Many users have already decided to delete their TeraBox accounts because of these frustrations. The good news is, you can take back control by deleting your TeraBox account. This guide will show you the straightforward steps to delete your account quickly and securely, so you can move on to better options.
TeraBox provides a generous 1TB of free cloud storage, which appeals to many users. However, there may come a time when you decide to move on. Whether you’re looking for better features with another service or have concerns about security, this guide will walk you through the steps to delete your TeraBox account. By the end, you’ll know how to delete TeraBox account and make sure your data is taken care of. Ready to get started? Let’s go.
Considerations Before Deleting Your TeraBox Account
Before you decide to delete your TeraBox account, keep these important factors in mind:
Permanent Data Loss
Deleting your TeraBox account will result in the permanent removal of all your files, photos, and videos stored on the platform. Make sure to back up anything important to another cloud service or a physical hard drive before taking this step.
Subscription Management
If you’re subscribed to TeraBox premium, your subscription will be canceled immediately when you delete your account. You won’t be able to get a refund for any payments already made, so it’s wise to cancel your subscription first to avoid losing money.
No Recovery After Deletion
Once your account is deleted, all associated data will be permanently inaccessible. You can set up a new account, but there’s no way to recover your old one or any of its contents.
Effect on Linked Devices
Deleting your TeraBox account will log you out from all connected devices. Ensure you have alternative storage or backups on those devices to avoid losing access to your files.
Use the TeraBox App
The only way to delete your account is through the TeraBox mobile app on Android or iOS. You can’t delete your account through the TeraBox website or desktop app.
Visit Your Related Post: Download TeraBox For PC
10 Simple Steps to Delete TeraBox Account
Here’s how you can delete your TeraBox account in just 10 simple steps:
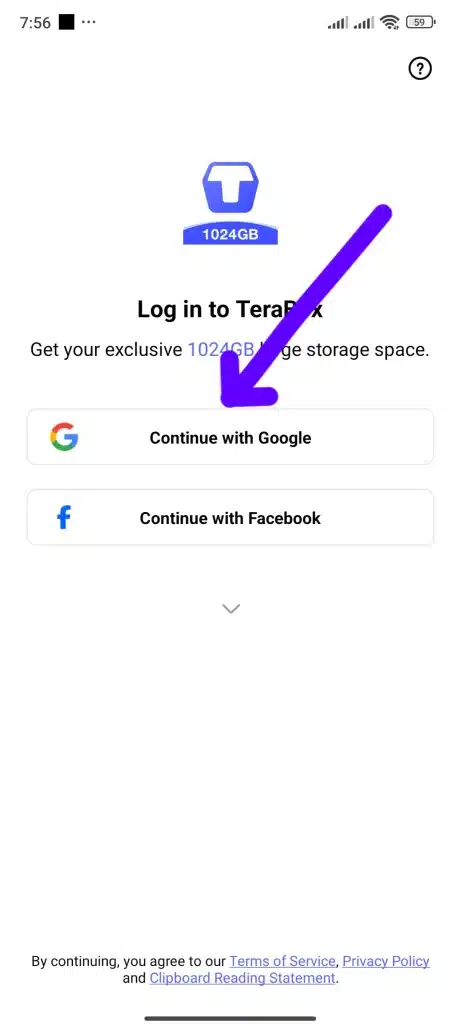
Step1: Log in to Your TeraBox Account
- Open the TeraBox app on your mobile device.
- Use your email and password to log in.
- If you signed up with Google or Facebook, log in with those credentials.
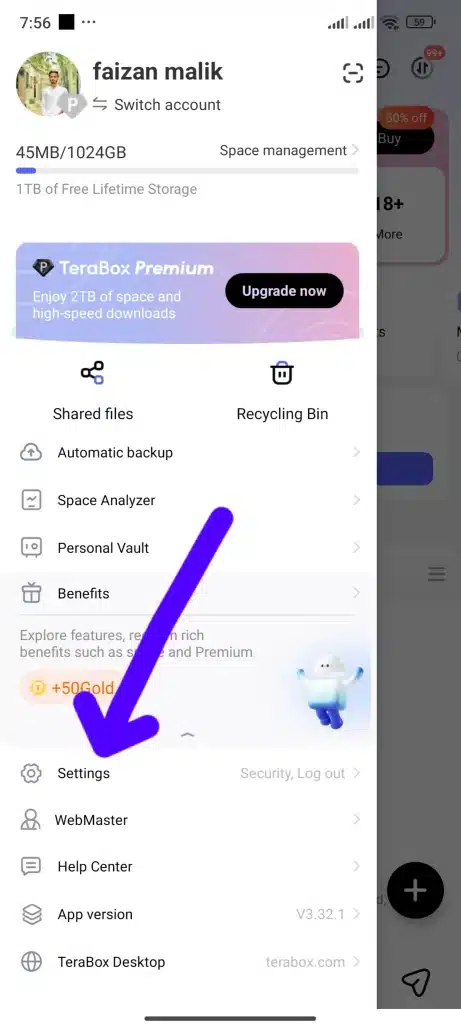
Step2: Access Your Profile Settings
- Tap on your profile picture in the top-right corner of the screen to open the main navigation menu.
- Look for the ‘Settings’ option.

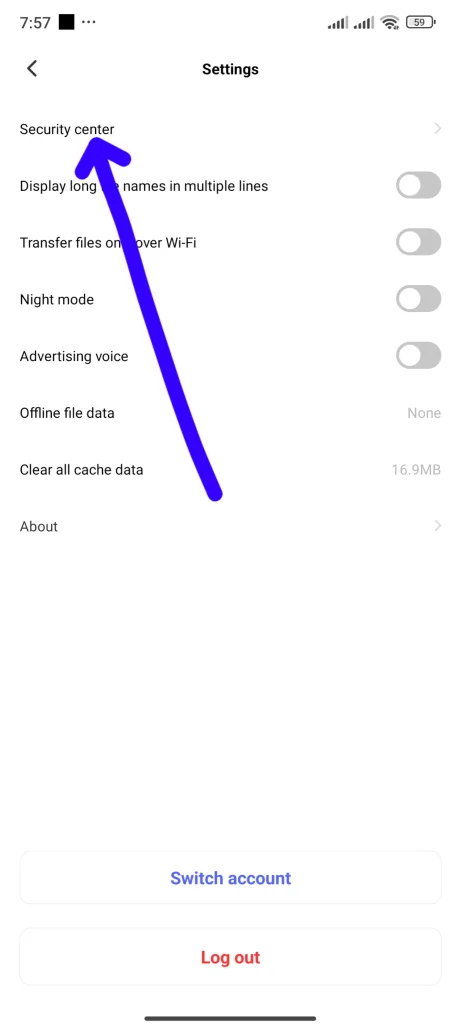
Step 3: Go to the Security Center
- In the settings menu, scroll down until you find ‘Security Center.
- Tap on it to access the account deletion options.
Step 4: Locate ‘Delete Account
- Scroll to the bottom of the Security Center menu, and find the ‘Delete Account’ option.
- Tap it to start the deletion process.
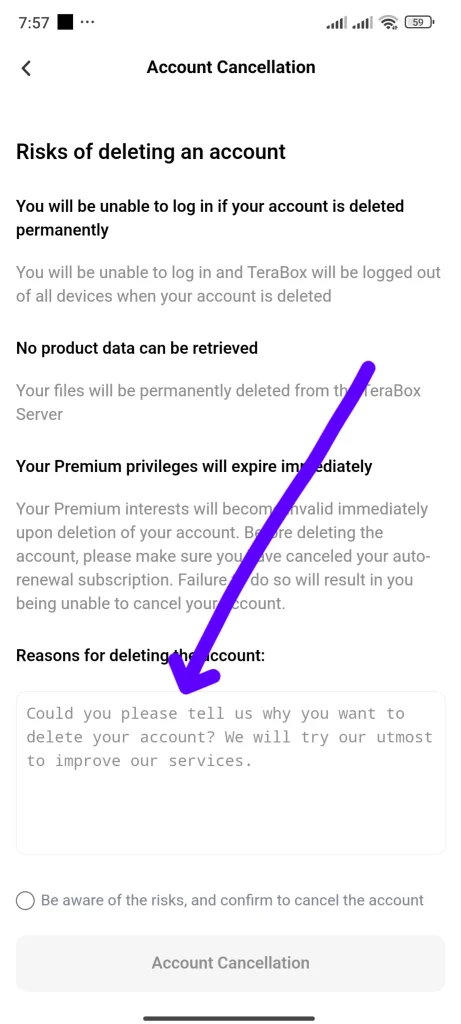
Step 5: Understand the Risks
- A warning will appear, explaining the risks of deleting your account.
- Take a moment to read this carefully so you’re aware of the permanent consequences.
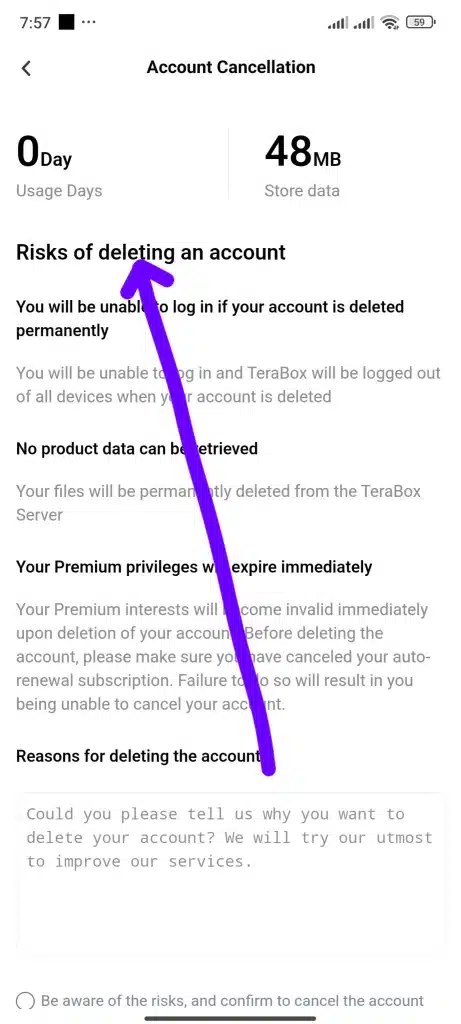
Step 6 : Provide Feedback (Optional)
- You may be asked to share your reason for deleting your account.
- This is optional, but your feedback can help TeraBox improve their service.
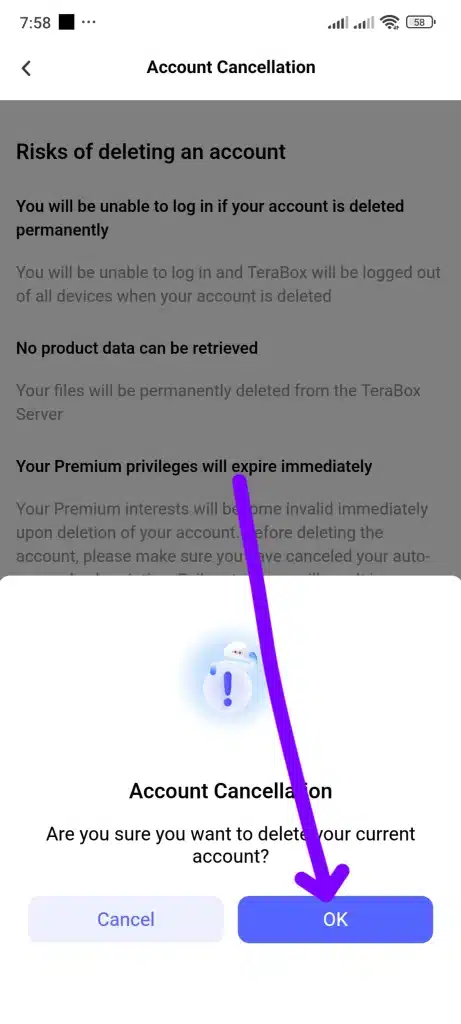
Step 7 : Confirm Your Decision
- After reviewing the risks, tap ‘Delete Account’ again.
- A prompt will ask if you’re sure about proceeding.

Step 8: Verify Your Identity
- To confirm your identity, re-enter your email and password.
- This step ensures that only you, the account owner, can delete the account.
Step 9: Final Confirmation
- Once you’ve entered your credentials, a final screen will appear.
- Tap ‘Confirm’ to complete the deletion process.
Step 10: Account Deletion Confirmation
- You’ll receive a notification confirming that your account has been successfully deleted.
- All your data will be erased, and you’ll be logged out immediately.
What Happens After You Delete Your TeraBox Account?
Once you delete your TeraBox account, all your data will be permanently removed from our servers. Any premium subscription you have will be canceled, and you’ll be logged out of all devices. Keep in mind that files you’ve downloaded to your local device will still be there, but everything stored in TeraBox will be lost for good.
Conclusion
Deleting your TeraBox account is a big deal, especially when there is risk of permanent loss of your all saved data. However,if you are sure about your selection, following the steps mentioned in this manual will make the deletion of TeraBox account smooth and easy. Remember to back up essential files before proceeding and control any energetic subscriptions to avoid pointless charges. By taking these precautions, you can safely delete your TeraBox account and go to other different storage solutions according to your needs.